Table of Contents
Using frontend interface
Default route to map
Inital default route to map page is /ustorelocator/location/map
Initial page
Upon map page load, all applicable locations will be displayed. Locations can be limited from several things.
- If you have Default Country configured in main config, locations from that country only will be shown.
- Only locations associated with current store or no store at all will be displayed. This is setup per location.
- If a search is made, then only locations matching the above conditions and fulfilling search criteria will show.
If Default Location Address is selected, it will be centered on map and zoomed in after map loads.
Map page elements
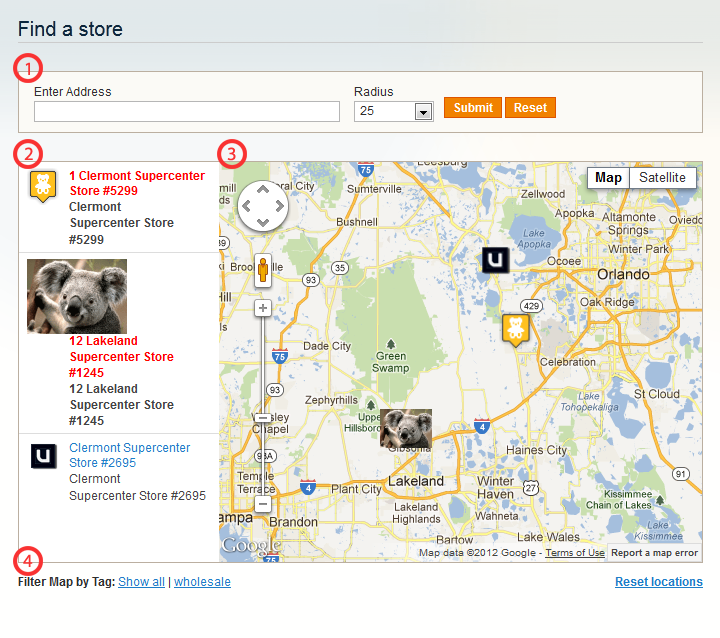
Map page consists on few areas.
- Search form - here you perform searches for locations near you.
- Locations sidebar - initial location list, search results list and directions list will be displayed here
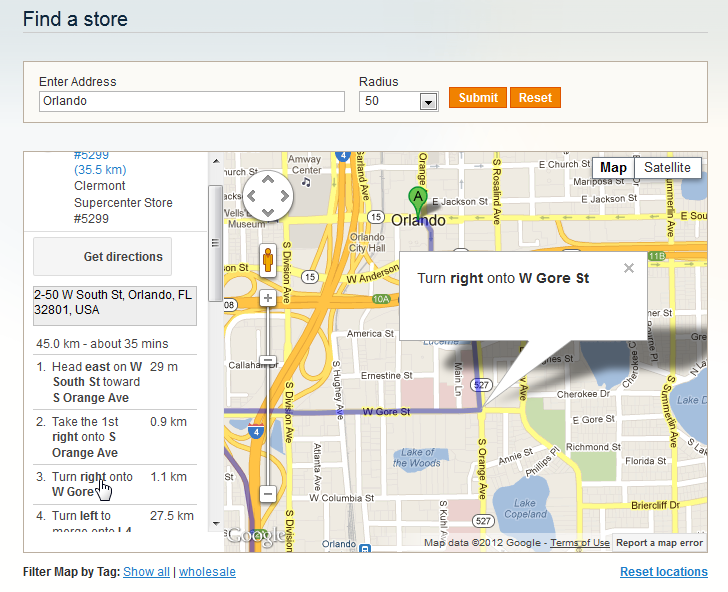
- Map - standard features Google map, that can be displayed as road map or satellite image map. It also displays each location's map pin and info window.
- Map footer - footer contains list of tags, a Show all and a Reset Locations text buttons
Using map
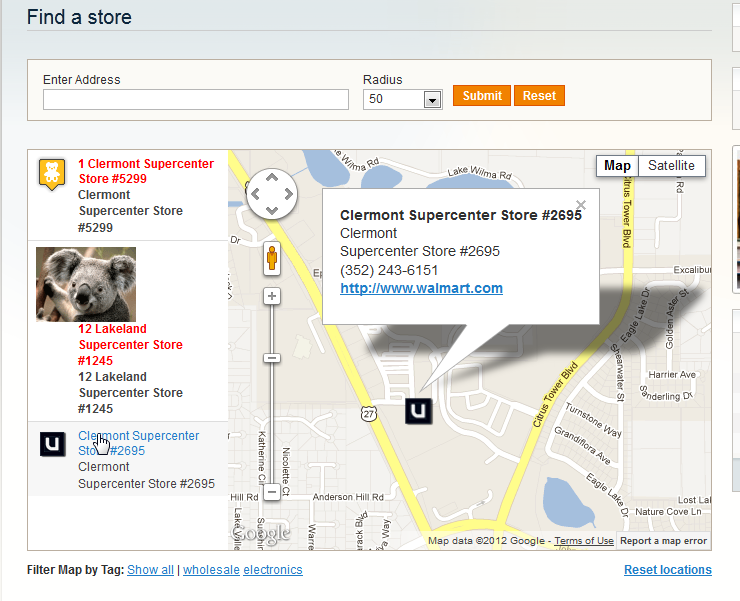
Map can be panned and zoomed using default Google map controls. When you click on a sidebar entry, it is centered on the map and zoomed at its pre-defined zoom level (default map zoom level is used if location does not have this defined). Also info window pops up on the map displaying location information such as title, display address, phone web or e-mail link. Clicking on any of the tags bellow the map, filters current list of locations by those tags. Only locations that have clicked tag in their Store type list will be shown. To show all current locations, click Show all link next to tags.
After performing search new list of locations is loaded, most often it will be a sub selection of initial locations. To show all initial locations click Reset locations
Searching
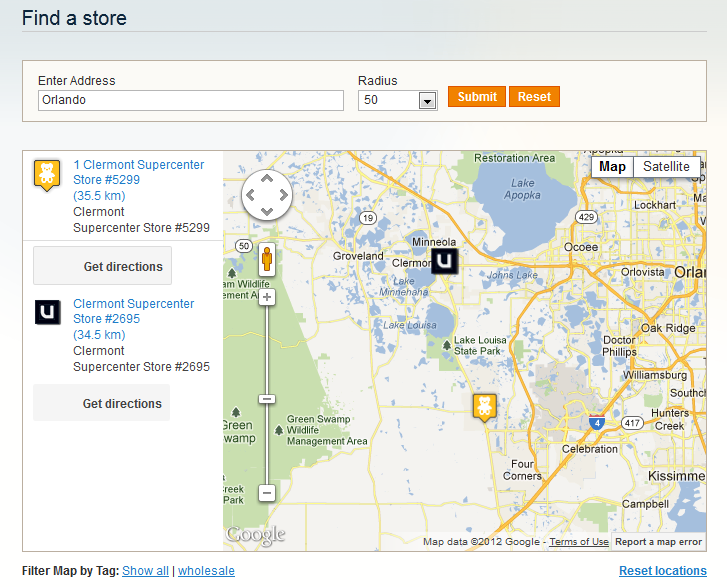
Search box above the map allows user to search for store locations placed within pre selected radius from the searched address. User can use for search term anything that Google understands. This includes exact addresses, location names, landmark names, zip codes etc. Only locations falling within selected radius will be considered. User can also search for specific location using its name or part of it. When performing search by name, radius is not taken into account.
Directions
After performing a search and receiving result, user has the option to get directions from search position to any of the listed results. To do that, user must click on 'Get directions' button beneath each result location.
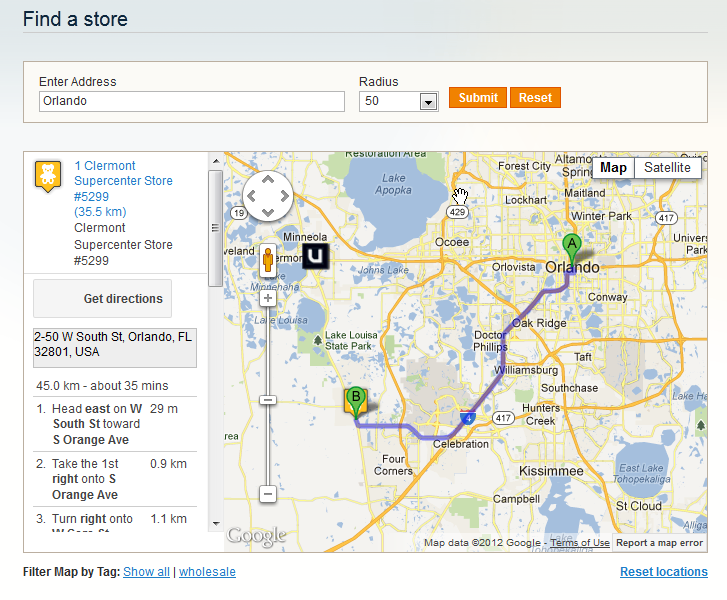
This will result in a list of turn by turn directions bellow result location and route line displayed on the map. By clicking on each step user will be shown closer view of that section of the route. For the moment only driving directions are available. Note: if search performed is by store name, directions are not available.
Customization
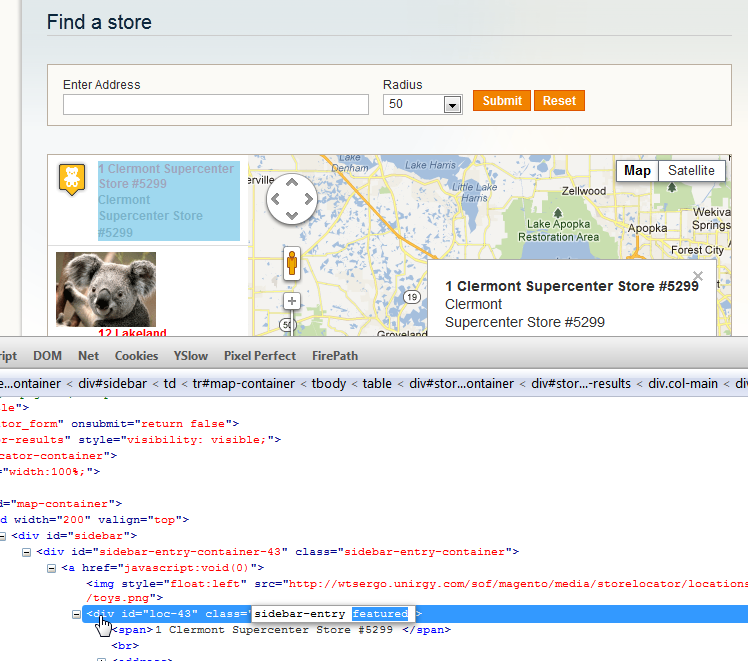
All elements of the page have class names and IDs that allow for map and form appearance customization. Featured locations by default have a “featured” class assigned which is very lightly emphasized by default with bold red text.
Sidebar entries, marker info window contents and directions elements can be greatly modified from within /app/design/frontend/base/default/template/unirgy/storelocator/map.phtml
Any of them is generated by customizable javascript code. You can provide your own functions to alter the html created. Each function accepts a location object in JSON format.
An example:
{
  "location_id": "43",
	"title": "1 Clermont Supercenter Store #5299 ",
	"address": "550 Us Highway 27, Clermont, FL 34714",
	"latitude": "28.3544277000",
	"longitude": "-81.6765845000",
	"address_display": "Clermont \r\nSupercenter Store #5299",
	"notes": "",
	"website_url": "http:\/\/www.walmart.com",
	"phone": "(352) 536-2750",
	"product_types": "wholesale",
	"udropship_vendor": null,
	"country": "US",
	"stores": "1",
	"icon": "http:\/\/wtsergo.unirgy.com\/sof\/magento\/media\/storelocator\/locations\/icons\/toys.png",
	"use_label": "0",
	"is_featured": true,
	"zoom": "10",
	"units": null,
	"distance": null,
	"icon_width": 32,
	"icon_height": 37
}
Initializing store locator javascript object accepts a configuration object with following structure:
{
	mapEl: ,// id of HTML element that will load the map,
	sidebarEl: ,// id of HTML element that will hold sidebar,
	searchUrl: ,// search backend URL, DO NOT CHANGE IT unless you modify backend too,
	scale_icon: ,// boolean flag to scale custom icons or not,
	initial_locations: ,// a list of initial locations, they are generated on the page, do not modify this unless you understand what to provide as data,
	min_zoom: ,// minimal map zoom, it is taken from store configuration,
	defaultLocation: ,// default location ID,
	units: ,// map units, it is taken from store configuration,
	route_not_found: ,// error message displayed when directions route cannot be found,
	generateSidebarHtml: ,// a function that must return HTML string which will be displayed as a single sidebar location, it accepts as only argument a JSON encoded location,
	generateDirectionsElement: ,// a function that must return HTML string which will be displayed as "Get directions button" and empty container for step by step directions list, it accepts as only argument a JSON encoded location,
	generateMarkerHtml:  ,// a function that must return HTML string which will be displayed as a single location info window, it accepts as only argument a JSON encoded location,
}
If you decide to provide custom HTML generation functions, make sure to keep any classes and IDs used to preserve all functionality.
Use in CMS page/block
If you want to show locations as part of a CMS page or static block, you can do so by adding the following where you want to see the map:
{{block type="ustorelocator/map" template="unirgy/storelocator/map.phtml"}}
This alone however is not enough, you should also import JavaScript files that are used by the module.
To do that you need to add to Design tab > Layout Update XML the following:
    <reference name="head">
        <action method="addJs"><script>storelocator/map.js</script></action>
        <action method="addCss"><stylesheet>css/storelocator.css</stylesheet></action>
    </reference>
The above can be done for CMS pages only, if you are using it in CMS static block you should find another way of adding the above XML layout update.

