Table of Contents
uMarketplace Microsite Pro Add-on
Introduction
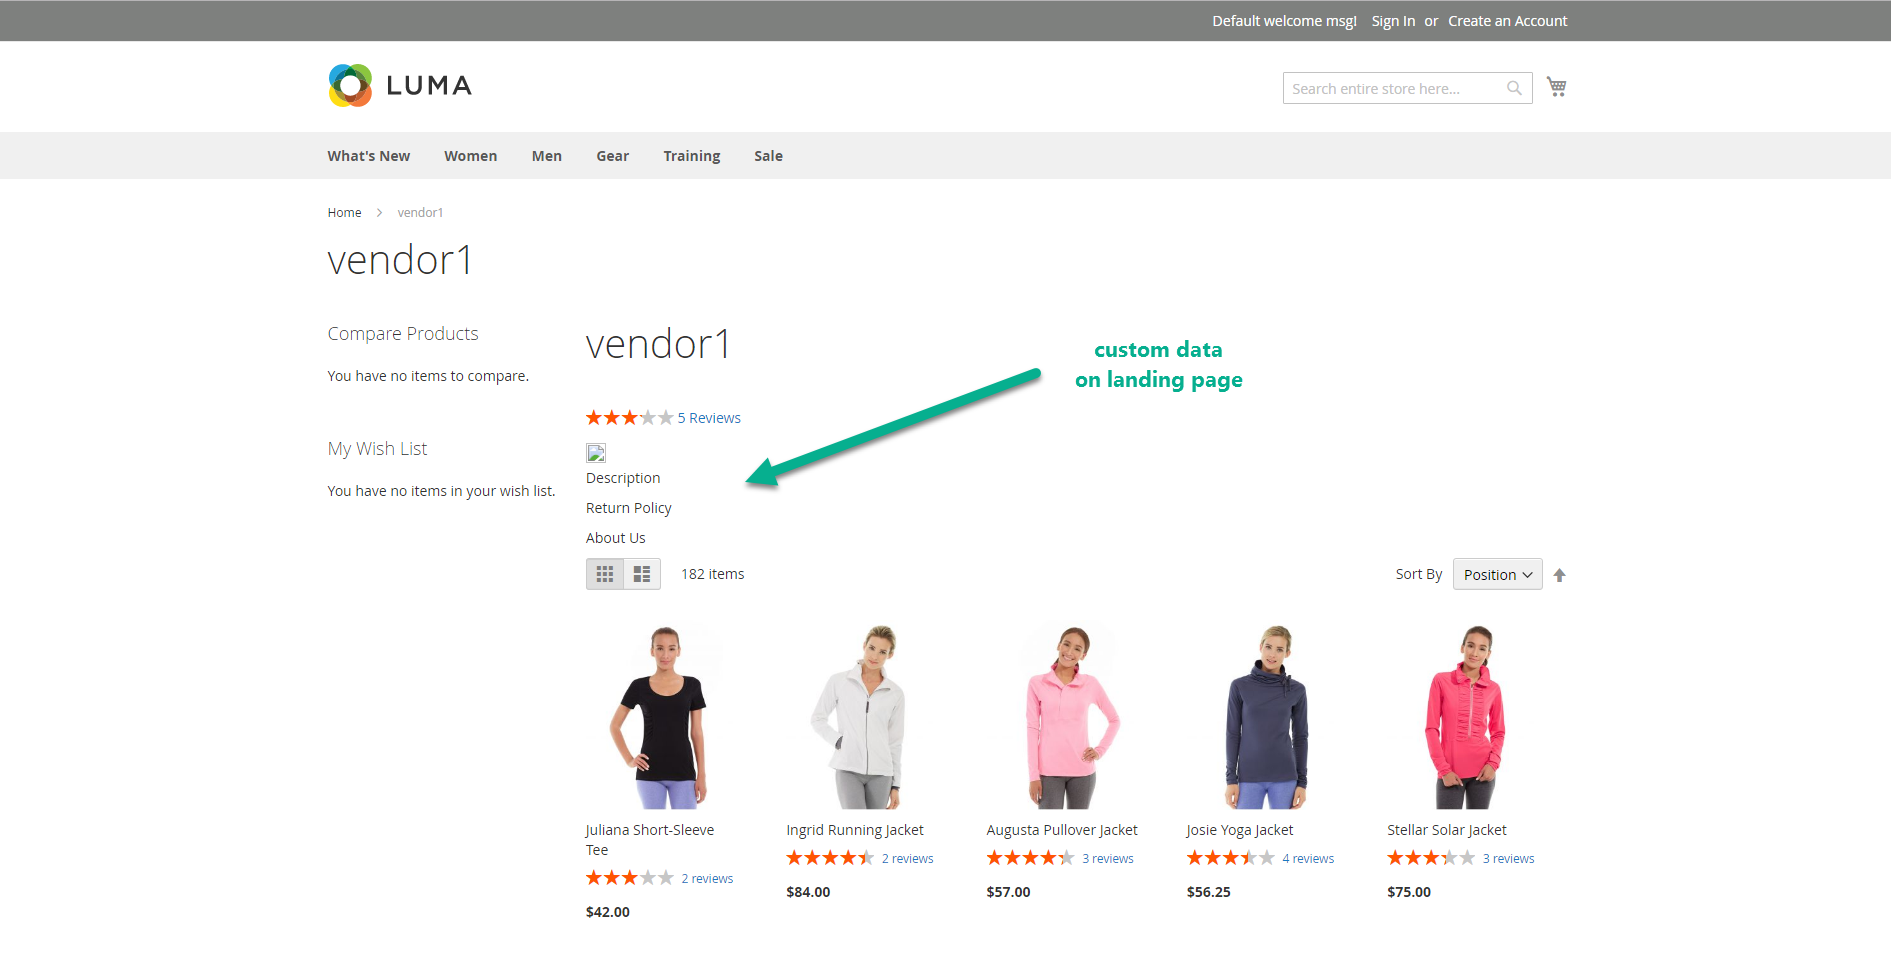
Microsite add-on functionlity allows vendors to have its own landing page, which will show vendor information and vendor specific products.
Here are basic steps to setup:
- Select type of URL vendor landing pages will use Configuration > Drop Shipping > MicroSite Options > Subdomain level to use for vendor.
“Vendor” stands for vendor URL key in actual URLs. Rest of the URL with vendor URL key could be anything that point to Magento root folder:- From URL Path (domain.com/vendor)
- 2nd level subdomain (vendor.com)
- 3rd level subdomain (vendor.domain.com)
- 4th level subdomain (vendor.subdomain.domain.com)
- 5th level subdomain (vendor.subdomain2.subdomain1.domain.com)
- Setup vendor URL keys in vendor edit > preferences > integration > url key
- If using Pro version make sure Yes selected vendor edit > Vendor Info > Allow Microsite
- If subdomains will be used, some assistance from server administrator might be required to configure webserver: to point all subdomains to Magento root. Make wildcard DNS to point all subdomains to the same server, or add subdomains to DNS for every new vendor, depends on how often new vendor is registered. Here are few other notices about subdomain usage:
- set “Configuration > Web > Redirect to Base URL if requested URL doesn't match it = No”, otherwise vendor URLs will redirect to website base URL
- if Ajax cart modules is used there might be an issue with the subdomains, since
add to cartneeds to make Ajax call to the main website URL which is different domain and browsers will forbid that. Even though, some browsers, like Chrome, provide workaround for this usingAccess-Control-Allow-OriginHTTP header (and it's implemented in UMarketplace), other browsers might not support that. - There is another workaround for
Ajax cartConfiguration > Drop Shipping > MicroSite Options > Update Store Base URL = Yes. This allows for URLs to change on microsite pages to http://vendor.domain.com/ , depending on configurations in Configuration > Drop Shipping > MicroSite Options > Subdomain level to use for vendor - if the main website URL is
www.domain.comand vendor landing pagevendor1.domain.comset Configuration > Web > Session Cookie Management > Cookie Domain = .domain.com, this will share session between main website and vendor landing pages to have one cart, otherwise there will be different carts.
Landing page customization
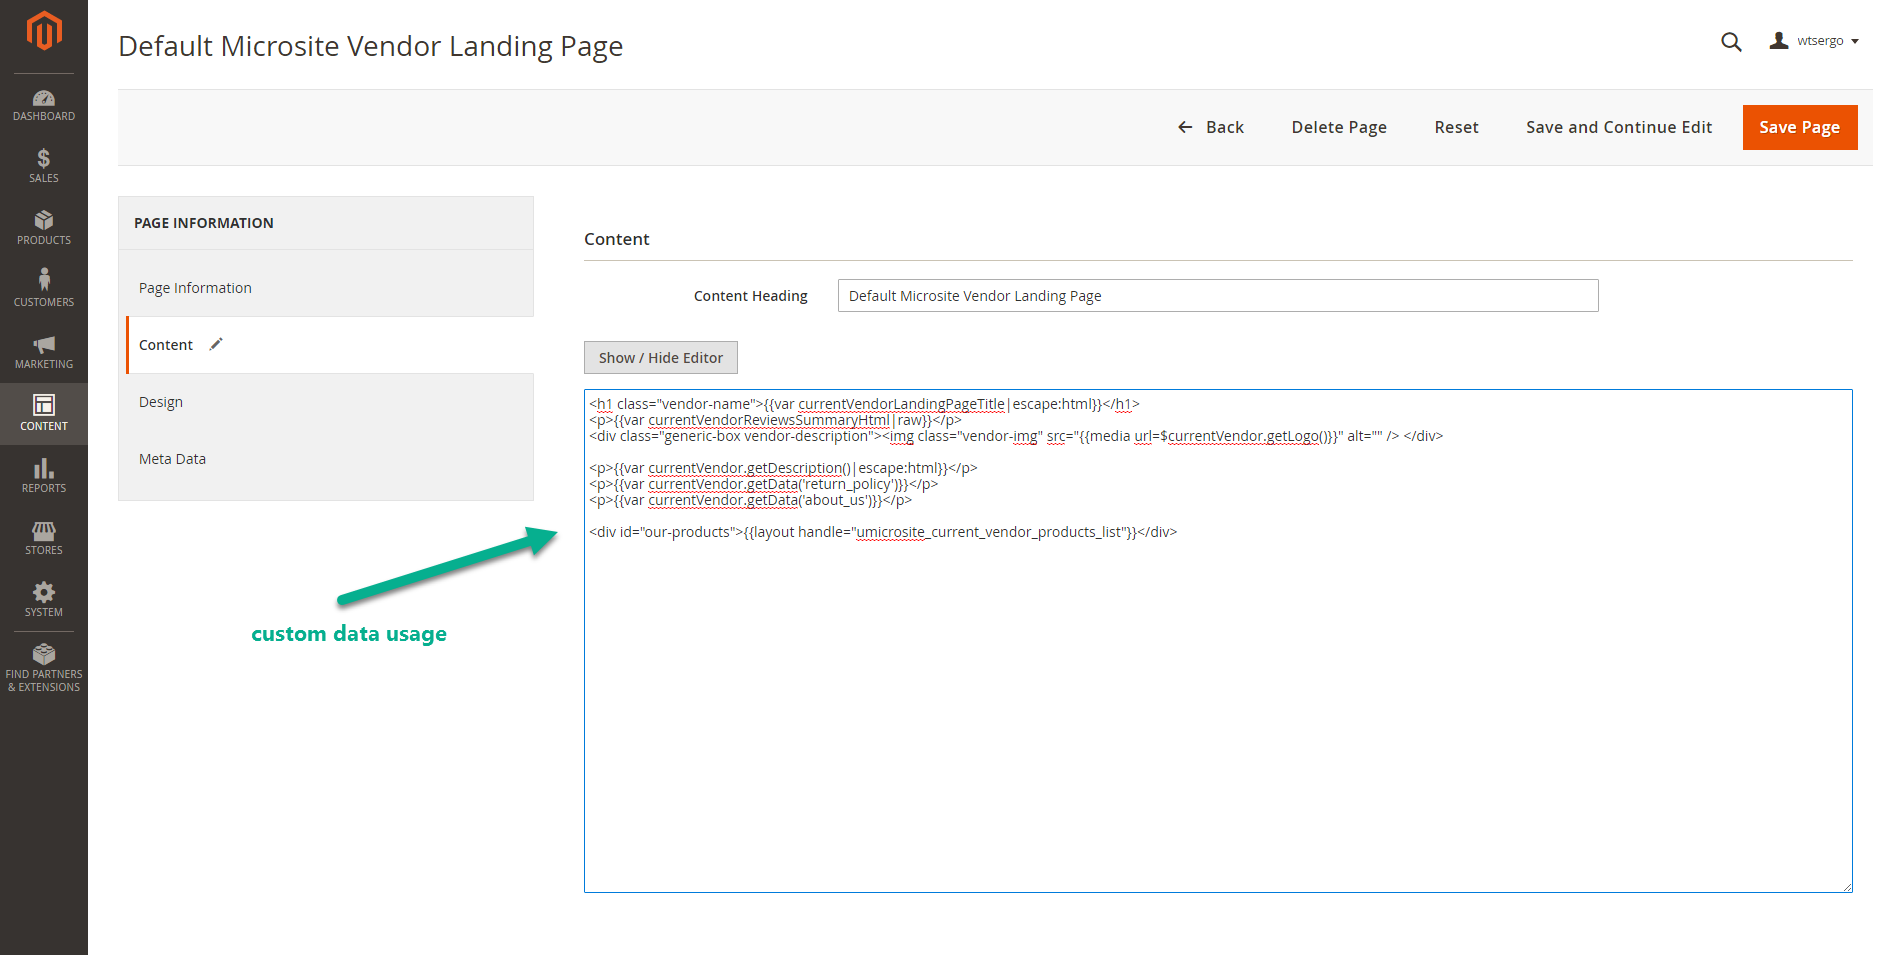
With Microsite Pro add-on, vendor specific CMS page can be created.
The following can be used as an example Default Microsite Vendor Landing Page.
Reference new page globally in Configuration > Web > Default Pages > Default Vendor Landing Page
or per vendor in vendor edit > preferences > microsite > CMS Landing Page
Basic Microsite add-on template can be customized app\design\frontend\default\default\template\unirgy\microsite\home.phtml
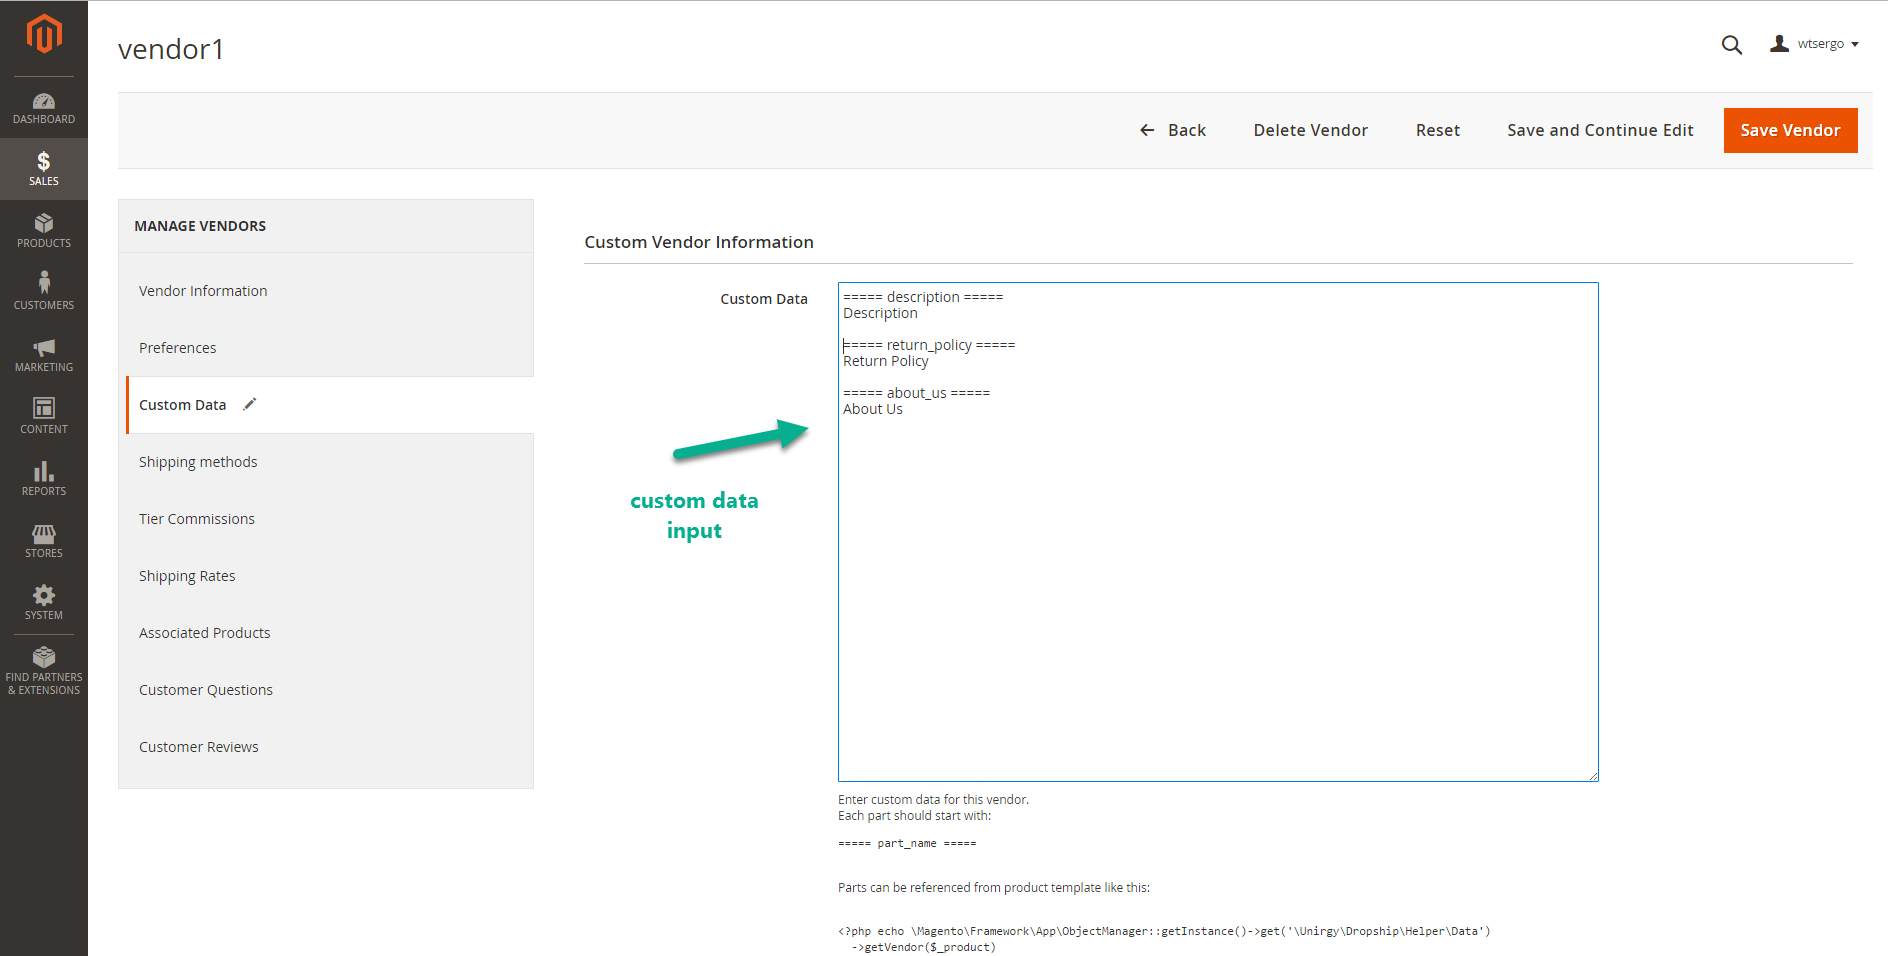
In vendor edit > Custom data tab, custom data in format can be entered
===== description =====


Description


===== return_policy =====


Return Policy


===== about_us =====


About Us
Reference data in the template via
<?php echo Mage::helper('umicrosite')→getCurrentVendor()→getData('description')?>


<?php echo Mage::helper('umicrosite')→getCurrentVendor()→getData('return_policy')?>


<?php echo Mage::helper('umicrosite')→getCurrentVendor()→getData('about_us')?>
With Microsite Pro CMS pages that data can be referenced using
{{var currentVendor.getData('description')}}


{{var currentVendor.getData('return_policy')}}


{{var currentVendor.getData('about_us')}}
On product pages the following codes can be used
<?php echo Mage::helper('udropship')→getVendor($_product→getUdropshipVendor())→getData('description') ?>


<?php echo Mage::helper('udropship')→getVendor($_product→getUdropshipVendor())→getData('return_policy') ?>


<?php echo Mage::helper('udropship')→getVendor($_product→getUdropshipVendor())→getData('about_us') ?>
Microsite Pro add-on provides the possibility to have different themes per vendor. Separate CMS page for specific vendor needs to be created and in
cms > pages > page edit > design tab > Custom Theme - choose a theme
then in vendor edit > preferences > Microsite > CMS Landing Page - reference that page
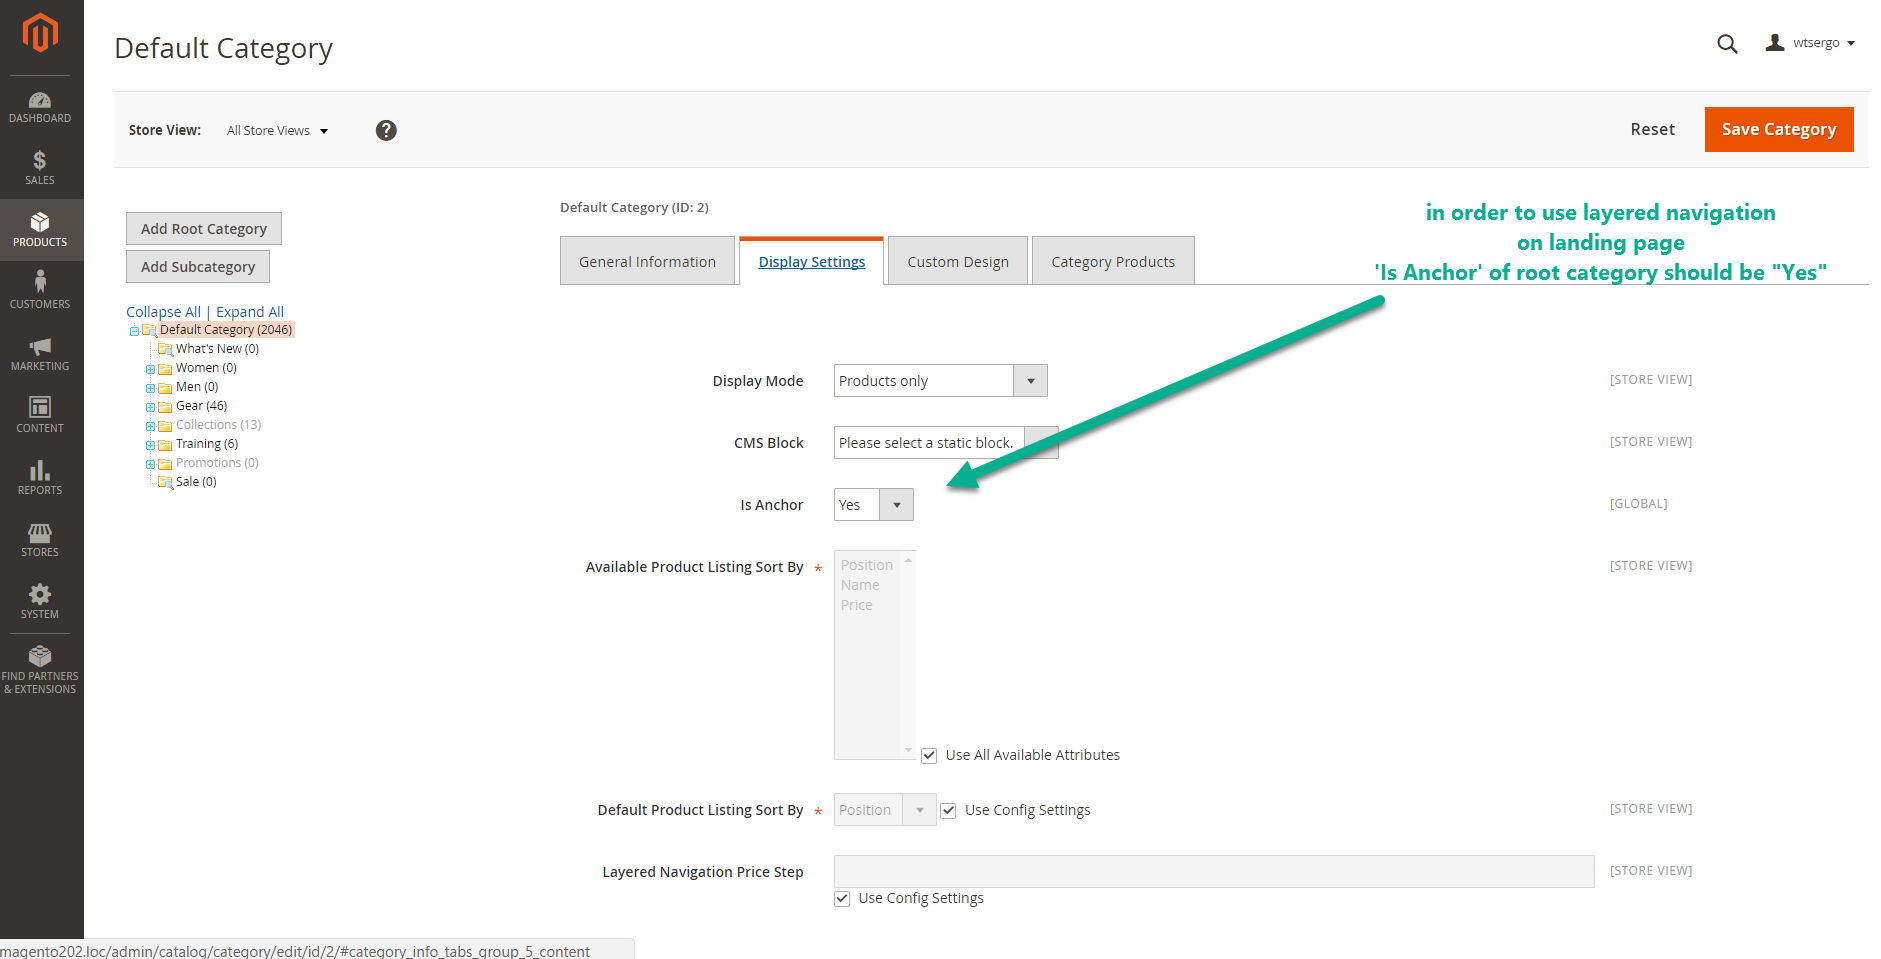
Show vendor products
By default landing page uses layered navigation. To make sure products are shown here, remove layered navigation code in landing page cms edit > design tab > Layout Update XML or set the root category “Is Anchor” attribute to “Yes”

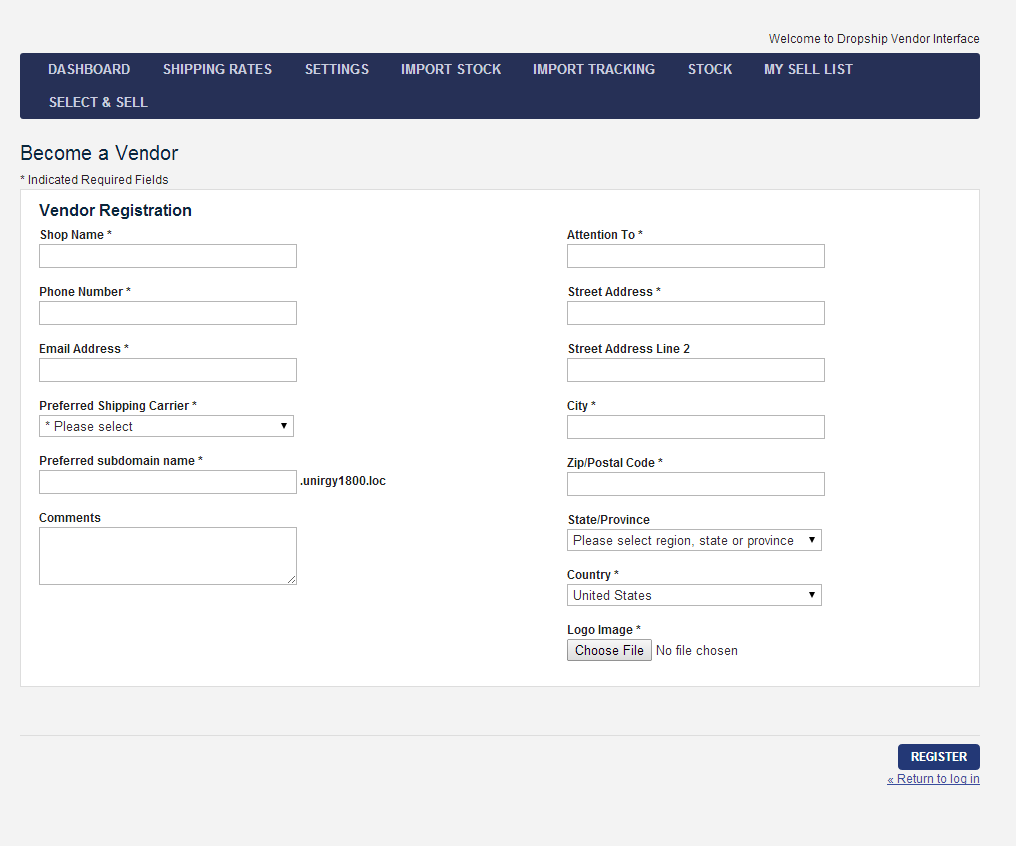
Vendors self-registration
Another important functionality Microsite add-on adds is vendors self-registration. Registration page is at <magento base url>/index.php/umicrosite/vendor/register/ or just <magento base url>/umicrosite/vendor/register/ (if webserver rewrites are configured)
Setup the template vendor with some default configuration to eliminate full configuration of new vendors during approval.
All preferences from template vendor will be copied to new registrations and only fields, given to vendors to fill on registration page, will be specific to vendor (override data from template vendor).
After template vendor setup select it in Configuration > Drop Shipping > MicroSite Options > Use this vendor as a template for new registrations
In order to receive notifications about new registrations enter email in Configuration > Drop Shipping > MicroSite Options > New Registrations Receiver(s)
Here is a default chain of emails vendor receive:
- after submitting registration form vendor receives confirmation email about registration Registration Confirmation Email Template
- then site administrator approve the registration by clicking on sales > dropship > vendor registrations item and save vendor
- after vendor save on prev stage vendor receive confirmation email with a link to confirm the email New Vendor Confirmation Email Template
- after clicking on activation link in previous email, vendor receives welcome email with login/password credentials New Vendor Welcome Email Template
Default behavior can be customized, e.g. add password field on registration form and welcome emails won't auto-generate passwords.
Also, the confirmation email can be skipped at all Configuration > Drop Shipping > MicroSite Options
> Skip confirmation email = Yes or when save vendor registration during approve select in vendor info > Send Confirmation Email = No
Vendor registrations can be automatically approved Configuration > Drop Shipping > MicroSite Options > Automatically approve vendor applications = Yes
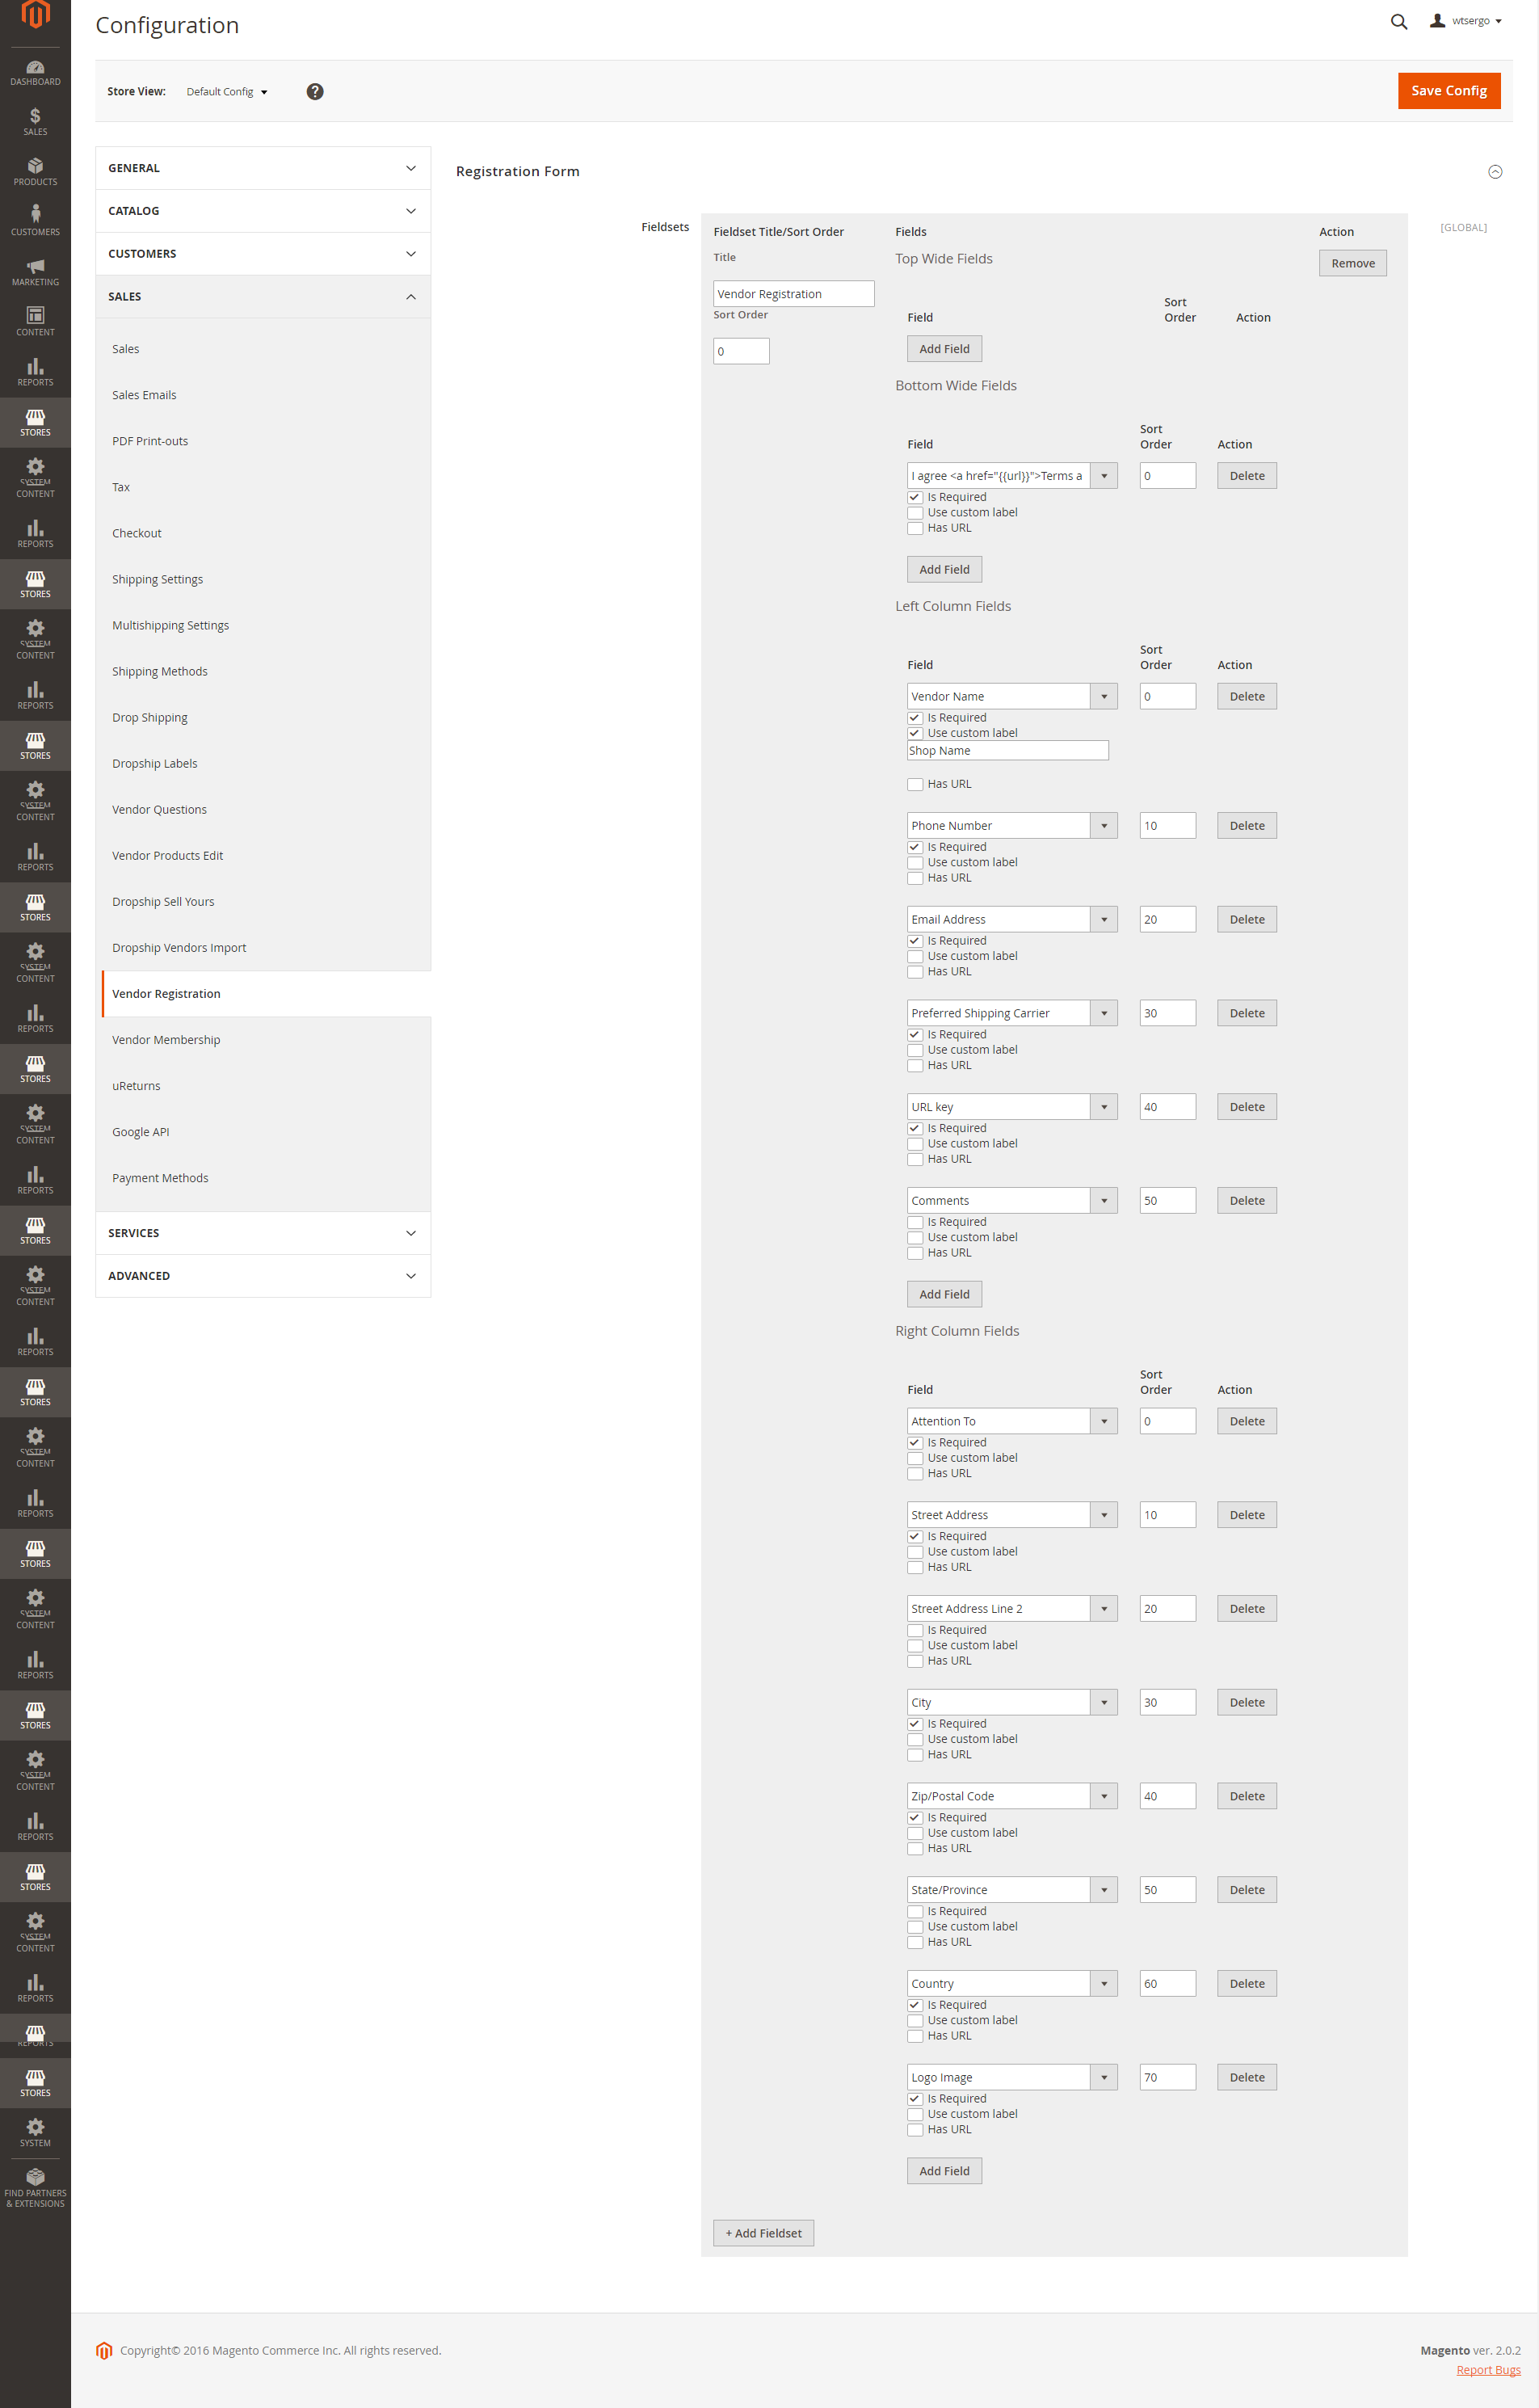
Customizing layout of registration page
Customize layout of registration page fields and fieldsets here Configuration > Vendor Registration > Registration Form. Custom fields can be added that not presented in vendor preferences, e.g. return policy, terms and conditions, payment information etc. This will require small customization http://www.unirgy.com/wiki/udropship/customization. After that new fields can be added in Configuration > Vendor Registration > Registration Form
CAPTCHA
Registration form could be configured to have CAPTCHA. First enable Magento native CAPTCHA in
Configuration > Customer Configuration > CAPTCHA > Enable CAPTCHA on Frontend
and then select Microsite Registration Form option in
Configuration > Customer Configuration > CAPTCHA > Forms
