Table of Contents
uMarketplace Statements/Commissions/Payouts
Introduction
uMarketPlace Suite manages payments in 2 ways:
- site owner accepts payments from customers once orders are placed then pay vendors using statements
- using PayPal Adaptive option where site owner receives commission and vendor payments are distributed at the point of sale when the order is placed
Statement is a financial document (report) that accomodate vendor orders for a period of time calculated according to configuration options.
The idea is to include vendor orders that reach configured status in statements.
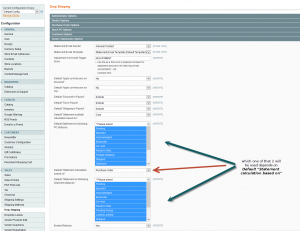
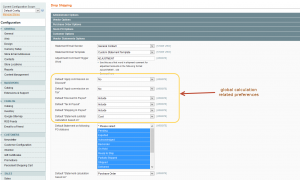
The required statuses can be setup in Configuration > Drop Shipping > Vendor Statements Options > Default Statement on following shipment statuses
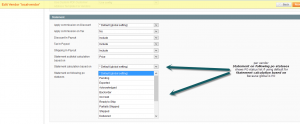
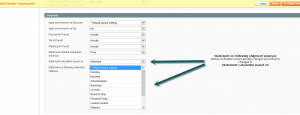
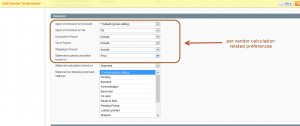
or for vendor specific in vendor edit > Preferences > Statement > Statement on following shipment statuses
in later * Default (global setting) can be selected, which will instruct the system to use global config option.
When vendor order reach one of the statuses selected in one of the 2 options, it's marked internally as applicable to be included in statement.
Once PO reaches the status then PO marked as ready to be paid, the date is recorded in Statement Ready At field and will be used for date from/to filter when statement generated.
Vendor order, in other words Magento shipment record, is served as PO in bare udropship or if Advanced PO add-on is used, separate record Purchase Order.
Advanced PO add-on's shipment or purchase order are the 2 record payment options, e.g. when paying by shipment there is more precise control to pay only for shipped items. (Purchase Order could be created, but not shipped or shipped only partially), but if vendor sells virtual or downloadable products, it will not be included in shipment records, therefore paying by Purchase Order will be the better option.
Set global configuration Configuration > Drop Shipping > Vendor Statements Options > Default “Statement calculation based on” to control on which records to pay the vendor.
The configuration have 2 options Purchase Order and Shipment , select the option that better fit your workflow or agreement with vendor.
Per vendor configuration is set in vendor edit > Preferences > Statement > Statement calculation based on, which also have special *Default (global setting) option. In UDropship Extension, without Advanced PO add-on, payment is done only by shipment.
Depending on the selection in one of that preferences 2 multiselects will be available:
- if “Purchase Order” selected
Configuration > Drop Shipping > Vendor Statements Options > Default Statement on following PO statuses
and per vendor
vendor edit > Preferences > Statement > Statement on following po statuses
- if “Shipment” selected aforementioned
Configuration > Drop Shipping > Vendor Statements Options > Default Statement on following shipment statuses
and per vendor
vendor edit > Preferences > Statement > Statement on following shipment statuses
Almost all configuration options for statements and most of UMarketplace configurations have 2 counterparts: global option and per vendor option. If per vendor option have specific value, it will be used for that vendor, but if per vendor option selected to use default, global option will be used instead. It will simplify the configuration of the common parts for all vendors.
How to create statements
Once basic configurations for which records and status to pay are completed, statements can be created.
It's quite important to configure everything that relates to statements prior to accepting customer orders, e.g. if proper statuses on which to pay is not seleced, but POs are already created, which possess applicable status, an indicator will not be seen (date when record is ready) in sales > shipments grid > Statement Ready At column
or in case paying per PO (Advanced PO add-on) in sales > dropship > Purchase Orders. Records will be included in the statement if status reaches selected one.
The main condition for PO to be included in statement is it's possession of one of the configured statuses.
Some configuration will have non-empty Statement Ready At column cells, but the records still not included in statement. The reason might be that in the past it did have configuration status, but no longer does.
Its practical to take into consideration PO's statuses transition in the workflow and include the one that comes last. In general it's Shipped and Delivered, but might be Canceled too (to cover returns/refunds).
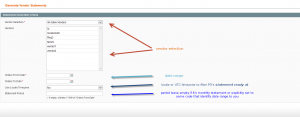
To create statement go to sales > dropship > Vendor Statements and click Generate Statements
there isVendor Selection selectbox with options:
- All Active Vendors - generate for all vendors regardless of selection in next multiselect
- Selected Vendors - generate only for vendors, selected in the next multiselect
Vendors
then the date range is setup Orders From Date and Orders To Date.
By default date range use UTC+00 timezone, to customize it, select “Yes” in Use Locale Timezone.
Statement Period - this can be left empty, if payment is done once a month or only one statement per month is maintained. Otherwise, explicitly set some custom value there, e.g. start/end days for which statement is generated
or number of week etc.
Here are some notes on how that field used and how statement_id generated:
value is entered in Statement Period field when create statement prefixed with <vendor_id>-
By default (when this field is empty) udropship generate statement id by following pattern:
<vendor_id>-YYMM or more precisely describing
<vendor_id>-<statement date year part><statement date month part>
for 2011-12-27 statement id will be 2-1112 and 1-1112 by default which already exists (for first 2 vendors).
Once the form is done, generate statements new records will appear in sales > dropship > Vendor Statements grid.
In grid Actions box massactions can be performed on statements refresh, print or send emails to vendor with statement PDF attached.
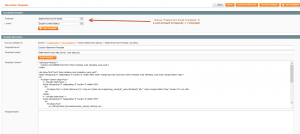
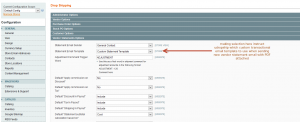
Custom transactional email can be created in Load default template select Statement Email Template
and select it in
Configuration > Drop Shipping > Vendor Statements Options > Statement Email Template
sender identity can be changed in
Configuration > Drop Shipping > Vendor Statements Options > Statement Email Sender
How statements calculated
There are 2 payment options to vendors: by price or by cost.
Global option is set in
Configuration > Drop Shipping > Vendor Statements Options > Default “Statement subtotal calculation based on”
and per vendor if specific
vendor edit > Preferences > Statement > Statement subtotal calculation based on
When paying by price, the following formula is used, price customer payed minus commissions configured and transaction fee.
Paying by cost will require to setup costs per product and it will use cost minus commissions configured and transaction fee to pay the vendor .
In bare udropship, to properly setup costs, product attribute needs to be created with code cost (if not have one) and associate it with existing attribute sets.
In case Multivendor add-on is used, costs setup in
product edit > Drop Shipping Vendors tab > Cost column
or in
vendor edit > associated products grid > Vendor Cost column
That is a base of configuration. The are also other configuration options that can affect calculation. Here is the list
Configuration > Drop Shipping > Vendor Statements Options > Default “Shipping In Payout”
and per vendor if specific
vendor edit > Preferences > Statement > Shipping In Payout
options are:
- Include - vendor PO shipping amount will be added to statement total
- Exclude but Show - shipping amount will be shown in statement but not added to total payout
- Exclude and Hide - won't be shown in statement and not affect total
Configuration > Drop Shipping > Vendor Statements Options > Default “Tax In Payout”
and per vendor if specific
vendor edit > Preferences > Statement > Tax In Payout
same list and meaning as in previos configuration
Configuration > Drop Shipping > Vendor Statements Options > Default “Discount In Payout”
and per vendor if specific
vendor edit > Preferences > Statement > Discount In Payout
same list but meaning is a bit different on how it affect total
- Include - reduce total by discount amount
Configuration > Drop Shipping > Vendor Statements Options > Default “Apply commission on Tax”
and per vendor if specific
vendor edit > Preferences > Statement > Apply commission on Tax
commission can be applied on tax (if include tax in payout) and total will be reduced by by tax commission.
Commission on price is calculated on price without tax. To calculate commission on price including tax, select that option to Yes and include tax in statement.
Configuration > Drop Shipping > Vendor Statements Options > Default “Apply commission on Discount”
and per vendor if specific
vendor edit > Preferences > Statement > Apply commission on Discount
it's similar to previous option, but will increase statement total by discount commission.
Here is an example:
Customer bought a product for $100 and got $20 discount.
Vendor commission is 10%. By default you will pay vendor $90, i.e. $100-$10 commission , but you want to pay based on discounted price you selected to include discount and it will calculate $100 - $10 commission of full price - $20 discount = $70 .
That might not what you intend if you share discounts with vendors. When you select to apply commission on discount you will pay
$100 - $10 commission of full price - $20 discount + $2 discount you cover = $72
As seen in the example, commission calculation is always performed on full price (excluding tax and discount), and then included or not tax (increase total), included discount (decrease total) and adjusted tax/discount by commission (decrease/increase total accordingly).
How to setup commissions and transaction fee
Commissions
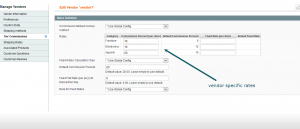
By using tier commissions, category and then subcategories created. That category is referenced in configuration > drop shiping > Tier Commission > Parent category for tiered categories and the subcategories of it used for tiers. Rates are setup by subcategory in “Tiered Rates”. Product rate depends on category it's assigned to. It's possible to use existing categories.
- Match Subcategories=yes - will search for match in subcategories recursively
- Match Subcategories=no - will look for exact assignment in one of tiered subcategories
When creating special parent category for tiered categories, set it's attribute Include in Navigation Menu to No, otherwise customer will see this system category.
Configuration > Drop shiping > Tier Commission > Product attribute code for “Commission percent”
Per product rates will be allowed to be specified. Custom product attribute needs to be created, assigned to attribute sets and it's code referenced in that setting.
Configuration > Drop shiping > Tier Commission > Commission fallback lookup method
and per vendor if specific
vendor edit > tier commissions > Commission fallback lookup method
this options will allow you to define how to find product's proper commission
- Vendor First - per vendor settings will be looked first
- Tier First - tier settings will be used as main priority
Here are common use cases:
Product specific rate is always takes priority.
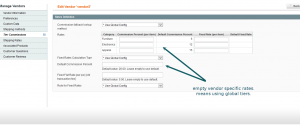
There is 3 tiered categories “Furniture”, “Electronics”, “Apparel”. Setup or not setup rates global section and per vendor section.
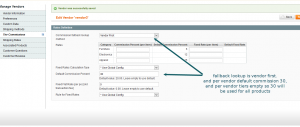
With Vendor First it will first look in product attribute, if empty look in
vendor edit > tier commissions > Rates row with category product assigned too
if empty look in
vendor edit > tier commissions > Default Commission Percent
then in
Configuration > Drop shiping > Tier Commission > Tiered Rates
and finally in
Configuration > Drop shiping > Tier Commission > Default Commission Percent
with Tier First it will switch
vendor edit > tier commissions > Default Commission Percent
with configuration > drop shiping > Tier Commission > Tiered Rates
in fallback lookup chain, i.e. global tier settings will take precedence over vendor default percent.
As example, let say we have 3 vendors: vendor1 use specific tiers setup, vendor2 use global tiers, vendor3 10% for all his products.
In that case we setup tiers globally and change nothing in vendor2 Tier Commission section.
For vendor1 we setup all tiers in Configuration > Drop shiping > Tier Commission > Tiered Rates
for vendor3 we change
vendor edit > tier commissions > Commission fallback lookup method = Vendor First
and set vendor edit > tier commissions > Default Commission Percent = 10
Transaction Fee
The main option, that setup transaction fee calculation process or fixed amount commission/fee, needs to be set in
configuration > drop shipping > Tier Commission > Fixed Rates Calculation Type
and per vendor
vendor edit > tier commissions > Fixed Rates Calculation Type
- Flat (per PO) - fixed amount you change per PO.
For each vendor PO, the statement total is reduced by amount set in
configuration > drop shipping > Tier Commission > Fixed Flat Rate (per po) [old transaction fee]
or per vendor
vendor edit > tier commissions > Fixed Flat Rate (per PO) [old transaction fee]
- Tier (per item) - fixed amount per item can be charged in addition to commission percent amounts set in the same table as tier commission
Configuration > Drop shipping > Tier Commission > Tiered Rates
or per vendor
vendor edit > tier commissions > Rates
Additionally, tier table can be set per product fixed amount to use as more priority then tier. Same as for tier commissions, create product attribute, associate with attribute sets and reference it's code in
configuration > drop shipping > Tier Commission > Product attribute code for “Tier Fixed Rate (per item)“
If product have non-empty value in that attribute, it will be used instead of tiered table setup globally or per vendor.
- Rule Based (per item) - rule can be set (cart line property) by which to determine proper fixed amount
configuration > drop shipping > Tier Commission > Rule for Fixed Rates
at the moment there is one option “Item price” and depending on that rule value fixed amount in table is defined
configuration > drop shipping > Tier Commission > Rule Based Fixed Rates
or per vendor
vendor edit > tier commissions > Rule Based Fixed Rates (in case per vendor Rule for Fixed Rates != * Use Global Config)
in that table rows are added for each If Up To value of selected rule (again Item price at the moment if the only option)
once item price match one of the rows Use Value cell used as rule based fixed amount.
- “Flat + Rule Based”, “Flat + Tier”, “Flat + Tier + Rule Based” - are combination of respective amounts, i.e can charge vendor per PO transaction fee plus some tier fee and/or rule based fee. All values will be accommodated in
Transaction Feecolumn of vendor statement
Adjustments/Refunds
There are 2 options to adjust statements and payouts:
- add comment in special format to Shipment records (or Purchase Order record if Advanced PO add-on is used and pay per PO).
The format is configured in
Configuration > Drop Shipping > Vendor Statements Options > Adjustment Comment Trigger Word
Once statement or payout generated, each PO comments will be scanned by the system. Once it finds something like
ADJUSTMENT: -120


Comment here
or in general
<adjustment trigger word>: <amount>


<adjustment comment>
It will take into the account the adjustment in statement or payout and increase/reduce total.
As it stated in the configuration field note, adjustment trigger word to be used as the first word of PO comment
The adjustments can be created in existing statements or once create/verify payout in “Adjustment” table. Amounts and related comments will be added and visible in statement PDF and increase/reduce statement/payout total.
The latest version of udropship does supports the refunds. To turn it on, set to “Yes” in
Configuration > Drop Shipping > Vendor Statements Options > Enable Refunds
The system will automatically try to determine refunded vendor PO items and reduce statement total accordingly. Refunds automatically work with statements only.
As opposed to POs, refunds included in statement by refund “created at” date (not status change date of PO). Here is one common scenario:
customer placed order in May, vendor sent an order in May too, vendor got paid for that PO. Then in June customer returned product and refund is created. There are 2 options to accommodate that (PO status change won't help since vendor was already paid for)
1) create adjustment in new statement directly, which will reduce vendor's further payout
2) or using refunds enabled, that refund will be included in new statement automatically and reduce total accordingly.
That might solve the problem when PO paid in one statement, but refunded in next statement.
Payouts (Payout add-on is required)
Payouts calculations works similar to statement calculations. In addition automatic payout or payout by schedule can be configured
vendor preferences > Payout > Payout Type = Auto
To make instant payout, once PO hit one of Statement on following PO statuses status or if Payout PO statuses source = Custom is used, once hit one of Payout on following po statuses
The better option is to use same settings as statement. Setup Payout Schedule for scheduled payouts and set Payout Type = Scheduled
Payout Schedule - use general crontab format.
The payouts it's not automated, except automatic payments to vendor, e.g. when offline method is used.
The benefit of it its clearly tracks all payments done to vendor and that is reflected in statement total due. Discrepancy can be easily revealed, when partial payments or some adjustments come into play. In case automatic or scheduled payouts are done, by generating a statement that cover date range, the amount paid can be determent. Payouts will be included in statement as final summary financial document or doing final review before payout (maybe adding some adjustments) pay can be done by statement. One statement can be maintained for month and pay vendor weekly. For that option create statement that cover future date (e.g. end of month) and each following week, refresh it and click “save and pay”, which will create new Payout record and once the payment is confirmed, click “save and pay” on the new payout page. It will record payout as paid and reduce statement total due.
Paypal integration in Payout add-on
PayPal as a payout method is integrated in two ways:
- using MassPay API
- Mass Payments can be made from and to any county, which have sending and receiving PayPal capabilities using currencies supported by PayPal.
- Premier or Business PayPal accounts must be whitelisted for the MassPay API by emailing or calling PayPal support before MassPay calls can be made in the live environment.
Here are few links for addtional information:
- using Adaptive Payments API
- The Adaptive Payments API is available in any country where PayPal is accepted.
Here are few links for addtional information:
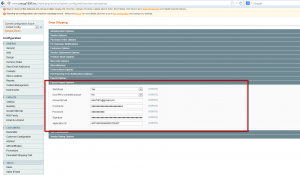
Enter Paypal API details in Configuration > Drop Shipping > Payout Paypal Options. It's used in both Mass Pay and Adaptive payments APIs.
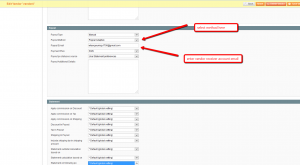
To enable the vendor to receive PayPal payouts set vendor edit > preferences > payout > Payout Method either Paypal option or Paypal Adaptive option. Vendor PayPal account email should be entered in vendor edit > preferences > payout > Paypal Email
Paypal Adaptive as Magento payment method
Paypal Adaptive payments also integrated as Magento payment method. This integration use either chained or parallel payments model https://www.paypalobjects.com/webstatic/en_US/developer/docs/pdf/pp_dev_Datasheet_APC_R3.pdf
To turn on parallel payments set Yes in
Configuration > Payment Methods > Paypal > Adaptive Payments > Use Parallel Payments
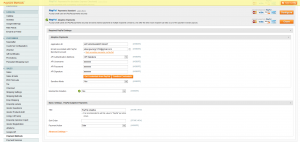
To enable the payment method go to Configuration > Payment Methods > Paypal. Click Configure button in Adaptive Payments section, setup API credentials, Application ID and other optional parameter. Then Select Yes in Enable this Solution.
Test mode does not require the Application ID, however, it will be need for the live environment https://developer.paypal.com/webapps/developer/docs/classic/lifecycle/goingLive/#credentials
To enable the vendor to accept the chained or the parallel payments set vendor edit > preferences > payout > Payout Method = Paypal Adaptive
Notice for Advanced PO add-on users
When you have advanced po installed make sure to set Purchase Orders in
Configuration > Drop Shipping > Vendor Statements Options > Default “Statement calculation based on”
Stripe Connect add-on for payments and payouts
We've integrated Stripe Connect service as customer payment method and vendor payout method.
1) First of all you need to register your platform. Follow instructions from here https://stripe.com/docs/connect/quickstart#register-platform
2) Then setup API credentials in Configuration > Payment Methods > uMarketplace Stripe Connect (platform client id, publishable key and secret key). Once done you are ready to accept customer credit card payments. For that just enable the payment method.
3) For vendor payouts we integrated stripe connect transfers. https://stripe.com/docs/connect/charges-transfers For that to work you need to change vendor's payout method to be stripe in vendor edit > preferences > payout > payout method
4) After vendor payout method set to stripe vendor need to link his account with your stripe platform. He will be prompted after login to vendor portal. We use standard account connection https://stripe.com/docs/connect/standard-accounts.
5) Once vendor connected his stripe account with your platform he is ready to accept payouts. Stripe payouts configuration is same as general payouts configuration. You can either do it manually or configure scheduled payouts or automatic (for each PO separately)
